Turning Arch Linux Into a Hacking Distro
A in-depth guide on how to turn your Arch Linux installation into a hacking box for penetration testing, bug bounty and CTF challenges.
Published on Jun 3, 2020

After years using Kali I’ve decided to change things for once and go for a much simpler and performant solution. Kali usually breaks out after a couple of months if you are not careful (at least it happened to me and my teammates), a thing that isn’t likely to occur using this Arch Linux setup, and I’ve been using it for more than 6 months and counting.
In this article I’ll show you how you can setup your own Arch Linux VM for your pentesting assessments, CTFs and etc. For that I’ve created warding, a simple script to install everything you need to get back on your feet. But make sure to check the guide below to learn how it was done.
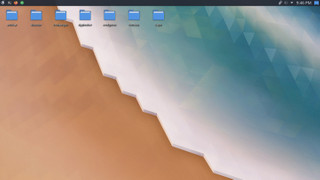
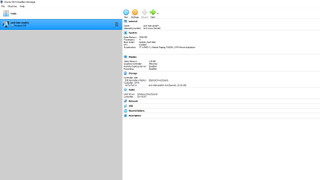
So, let’s get started, download a copy of the Arch’s image here and boot the image with the EFI option checked on your favorite virtualization software, such as Virtual Box or VMware for example. The minimum HD size should be 32GB though.
Doing so will bring you to the live image, which can be run as is or permanently installed on your virtual drive.
In order to setup our VM we will need to configure the system and install a few additional packages, even a custom repository for the hacking tools.
Setup
The setup is fairly simple for the most part, follow along and refer to the script if need be. AUR isn’t covered at the moment.
You may type the commands in the current shell in the live image, running as root.
Clock Setup
The first thing we need to do is setup the date and timezone settings:
# Enable automatic clock time
timedatectl set-ntp true
# Setup timezone, change to your location
timedatectl set-timezone Brazil/East
Partitions Setup
Setup the partitions, in this example we are opting for a GPT/LVM configuration without any encryption.
# Setup disk partitions
parted -s -a optimal /dev/sda \
  mklabel gpt \
  mkpart primary fat32 0% 512MiB \
  set 1 esp on \
  mkpart primary ext4 512MiB 100% \
  set 2 lvm on

# Setup LVM settings
pvcreate /dev/sda2
vgcreate vg0 /dev/sda2
lvcreate -L 4G vg0 -n swap
lvcreate -l 100%FREE vg0 -n root

# Make root partition
mkfs.ext4 /dev/vg0/root
mount /dev/vg0/root /mnt

# Make boot partition
mkfs.fat -F32 /dev/sda1
mkdir /mnt/boot
mount /dev/sda1 /mnt/boot

# Make swap
mkswap /dev/vg0/swap
swapon /dev/vg0/swap
Install Base Packages
In order to get the system running we will need some base packages…
# Update keyring
pacman -Sy archlinux-keyring --noconfirm

# Install base packages
pacstrap /mnt base base-devel

# Generate fstab entries
genfstab -U /mnt > /mnt/etc/fstab
Setup Base Confs, Kernel and Bootloader
To make our image bootable we need to install the Linux kernel, a bootloader and update some configs.
# Setup chroot clock time and timezone
arch-chroot /mnt ln -sf /usr/share/zoneinfo/Brazil/East /etc/localtime
arch-chroot /mnt hwclock --systohc

# Setup chroot locale
echo "en_US.UTF-8" > /mnt/etc/locale.gen
arch-chroot /mnt locale-gen
echo "LANG=en_US.UTF-8" > /mnt/etc/locale.conf

# Setup chroot keymap
echo "KEYMAP=us" > /mnt/etc/vconsole.conf

# Setup chroot hostname
echo "warding" > /mnt/etc/hostname

# Setup chroot hosts
echo "127.0.0.1 localhost
::1 localhost
127.0.1.1 warding.localdomain warding" > /mnt/etc/hosts

# Setup chroot root password
arch-chroot /mnt echo -e "warding\nwarding" | passwd

# Install Linux kernel
arch-chroot /mnt pacman -Sy archlinux-keyring linux lvm2 mkinitcpio --noconfirm

# Setup chroot mkninitcpio
sed -i '/^HOOK/s/filesystems/lvm2 filesystems/' /mnt/etc/mkinitcpio.conf
arch-chroot /mnt mkinitcpio -p linux

# Install microcode
arch-chroot /mnt pacman -S intel-ucode --noconfirm

# Setup chroot bootloader
arch-chroot /mnt bootctl install
echo "title Warding Linux
linux /vmlinuz-linux
initrd /intel-ucode.img
initrd /initramfs-linux.img
options root=/dev/vg0/root rw" > /mnt/boot/loader/entries/warding.conf
Install Basic Packages
In this step we will be installing the very basic packages for minimal usage and a desktop environment, of course.
# Install basic packages
arch-chroot /mnt pacman -S make nano fuse wget automake cmake gcc autoconf openbsd-netcat dhcpcd samba openssh openvpn unzip vim xorg-server xf86-video-intel plasma konsole dolphin kmix sddm wget git kvantum-qt5 zsh --noconfirm

# Update sddm conf
mkdir /mnt/etc/sddm.conf.d
echo "[Theme]
Current=breeze" > /mnt/etc/sddm.conf.d/theme.conf
echo "[Autologin]
User=root" > /mnt/etc/sddm.conf.d/login.conf

# Enable login and network services
arch-chroot /mnt systemctl enable dhcpcd
arch-chroot /mnt systemctl enable sddm

# Setup blackarch repo
arch-chroot /mnt wget -qO- https://blackarch.org/strap.sh | sh

# Setup zsh shell
arch-chroot /mnt wget -qO- https://raw.githubusercontent.com/ohmyzsh/ohmyzsh/master/tools/install.sh | sh
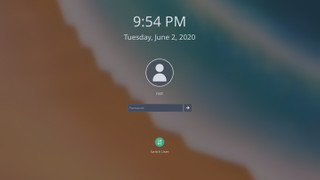
The login screen will look something like this in case if you are wondering:
Install Themes/Icons
Install a better theme and icon packages, to make it look shiny. Not really required.
# Install theme and icon set
arch-chroot /mnt wget -qO- https://raw.githubusercontent.com/PapirusDevelopmentTeam/arc-kde/master/install.sh | sh
arch-chroot /mnt wget -qO- https://git.io/papirus-icon-theme-install | sh
Install Hacking Tools
And last but not least, install all the good stuff you may use, wordlists included.
# Install basic tools
arch-chroot /mnt pacman -S nmap impacket go ruby php firefox atom hashcat john jre-openjdk proxychains-ng exploitdb httpie metasploit bind-tools radare2 sqlmap wpscan xclip --noconfirm
# Setup wordlists
arch-chroot /mnt mkdir -p /usr/share/wordlists
arch-chroot /mnt wget -q https://github.com/danielmiessler/SecLists/raw/master/Passwords/Leaked-Databases/rockyou.txt.tar.gz -O /usr/share/wordlists/rockyou.txt.tar.gz
arch-chroot /mnt wget -q https://github.com/danielmiessler/SecLists/raw/master/Discovery/Web-Content/common.txt -O /usr/share/wordlists/common.txt
Finish Installation
We are done, make sure to remove the Arch’s live image from the boot options if it returns you to the live image.
# Finish installation
umount -R /mnt
reboot
Quick Install
If you wish to install everything, aside from the theme and hacking tools you may use the command below for an automatic installation.
wget -qO- https://raw.githubusercontent.com/marlospomin/warding/master/install.sh | sh
Options
Running the script locally will allow you to specify custom flags, -e and -t to install the custom theme and tools.
# Install tools only
./install.sh -t
# Install everything
./install.sh -et
More info here.
Post Installation
After the installation is done, the theme might not fit perfectly on the system just yet, open the kvantum application and apply the desired look as your global theme.
A few tools will require some extra configuration but that’s up to you.
Ending
Thanks for reading!